Parts List
- Arduino UNO R4 WiFi
- MCUFRIEND 2.4" TFT shield (resistive touch, ILI9341 or compatible)
- Reed switch (door sensor) — wired to
SCLpin - Physical momentary button — wired to
D1 (TX)pin - USB-C power supply or 5 V DC barrel jack
- Home Assistant instance with MQTT broker (e.g. Mosquitto add-on)
- 2.4 GHz Wi-Fi network
- Dupont jumper wires, enclosure of your choice
Wiring
The TFT shield slots directly onto the Arduino headers. The two external sensors connect to spare pins left exposed by the shield.
- Reed switch → one leg to
SCL, other leg toGNDuses INPUT_PULLUP - Physical button → one leg to
D1, other leg toGNDuses INPUT_PULLUP - TFT backlight →
D7(HIGH = on) - TFT touch X+/X−/Y+/Y− →
D9 / A3 / A2 / D8(shield default)
Required Libraries
Install all of these through the Arduino IDE Library Manager (Tools → Manage Libraries):
- Riscduino_MCUFRIEND_kbv — TFT driver
- Adafruit GFX Library — graphics primitives
- TouchScreen — resistive touch decoding
- WiFiS3 — built-in, UNO R4 WiFi only
- ArduinoMqttClient — MQTT publish/subscribe
Home Assistant & MQTT Setup
-
Install & configure the Mosquitto MQTT broker
In Home Assistant, go to Settings → Add-ons → Mosquitto broker and install it. Create an MQTT user under Settings → People (or use an existing HA user). Note the broker's local IP — you'll put it in the sketch.
-
MQTT topics used by this sketch
All topics are prefixed with
home/buttons/office/oroffice/. The sketch publishes commands and subscribes to/statefeedback so the display stays in sync if HA changes a device externally.MQTT topic map# Published by Arduino (commands) home/buttons/office/light → "ON" / "OFF" home/buttons/office/power → "ON" / "OFF" home/buttons/office/3dprint → "ON" / "OFF" home/buttons/office/tap → "1" / "2" / "3" / "long" office/door/state → "open" / "closed" office/arduino/temperature → "26.3" (°C, float string) # Subscribed by Arduino (state feedback) home/buttons/office/light/state → "ON" / "OFF" home/buttons/office/power/state → "ON" / "OFF" home/buttons/office/3dprint/state → "ON" / "OFF" # Auto-discovery (published once on boot, retained) homeassistant/binary_sensor/office_door/config homeassistant/sensor/office_arduino_temp/config -
Create HA automations for each button
In Home Assistant create an automation triggered by MQTT message on e.g.
home/buttons/office/light. The action toggles your light switch entity, then publishes the new state back tohome/buttons/office/light/stateso the panel display updates.YAML — example HA automation (light button)alias: "Office panel - light button" trigger: - platform: mqtt topic: home/buttons/office/light action: - service: > {% if trigger.payload == 'ON' %} light.turn_on {% else %} light.turn_off {% endif %} target: entity_id: light.office_main - service: mqtt.publish data: topic: home/buttons/office/light/state payload: "{{ trigger.payload }}" retain: false
Arduino Sketch
Download the sketch and edit the WiFi & MQTT CONFIG block near the top of the file before uploading. The sketch compiles on Arduino IDE 2.x with the UNO R4 WiFi board package installed.
Download sketch_jan27a.inoWhat to edit before uploading
-
WIFI_SSID— your 2.4 GHz network name
WIFI_PASS— your Wi-Fi password -
MQTT_BROKER— local IP of your Home Assistant / Mosquitto host (e.g.192.168.1.XX)
MQTT_PORT— default1883, change if you use a custom port -
MQTT_USER— MQTT broker username
MQTT_PASS— MQTT broker password -
MQTT_LOCATION— short label used as the topic prefix (default"office"). All topics becomehome/buttons/office/…— change this if you deploy a second panel. -
MQTT_CLIENT_ID— unique ID for this device on the broker (default"arduino_r4_panel"). Must be unique if you run more than one panel.
How It Works
-
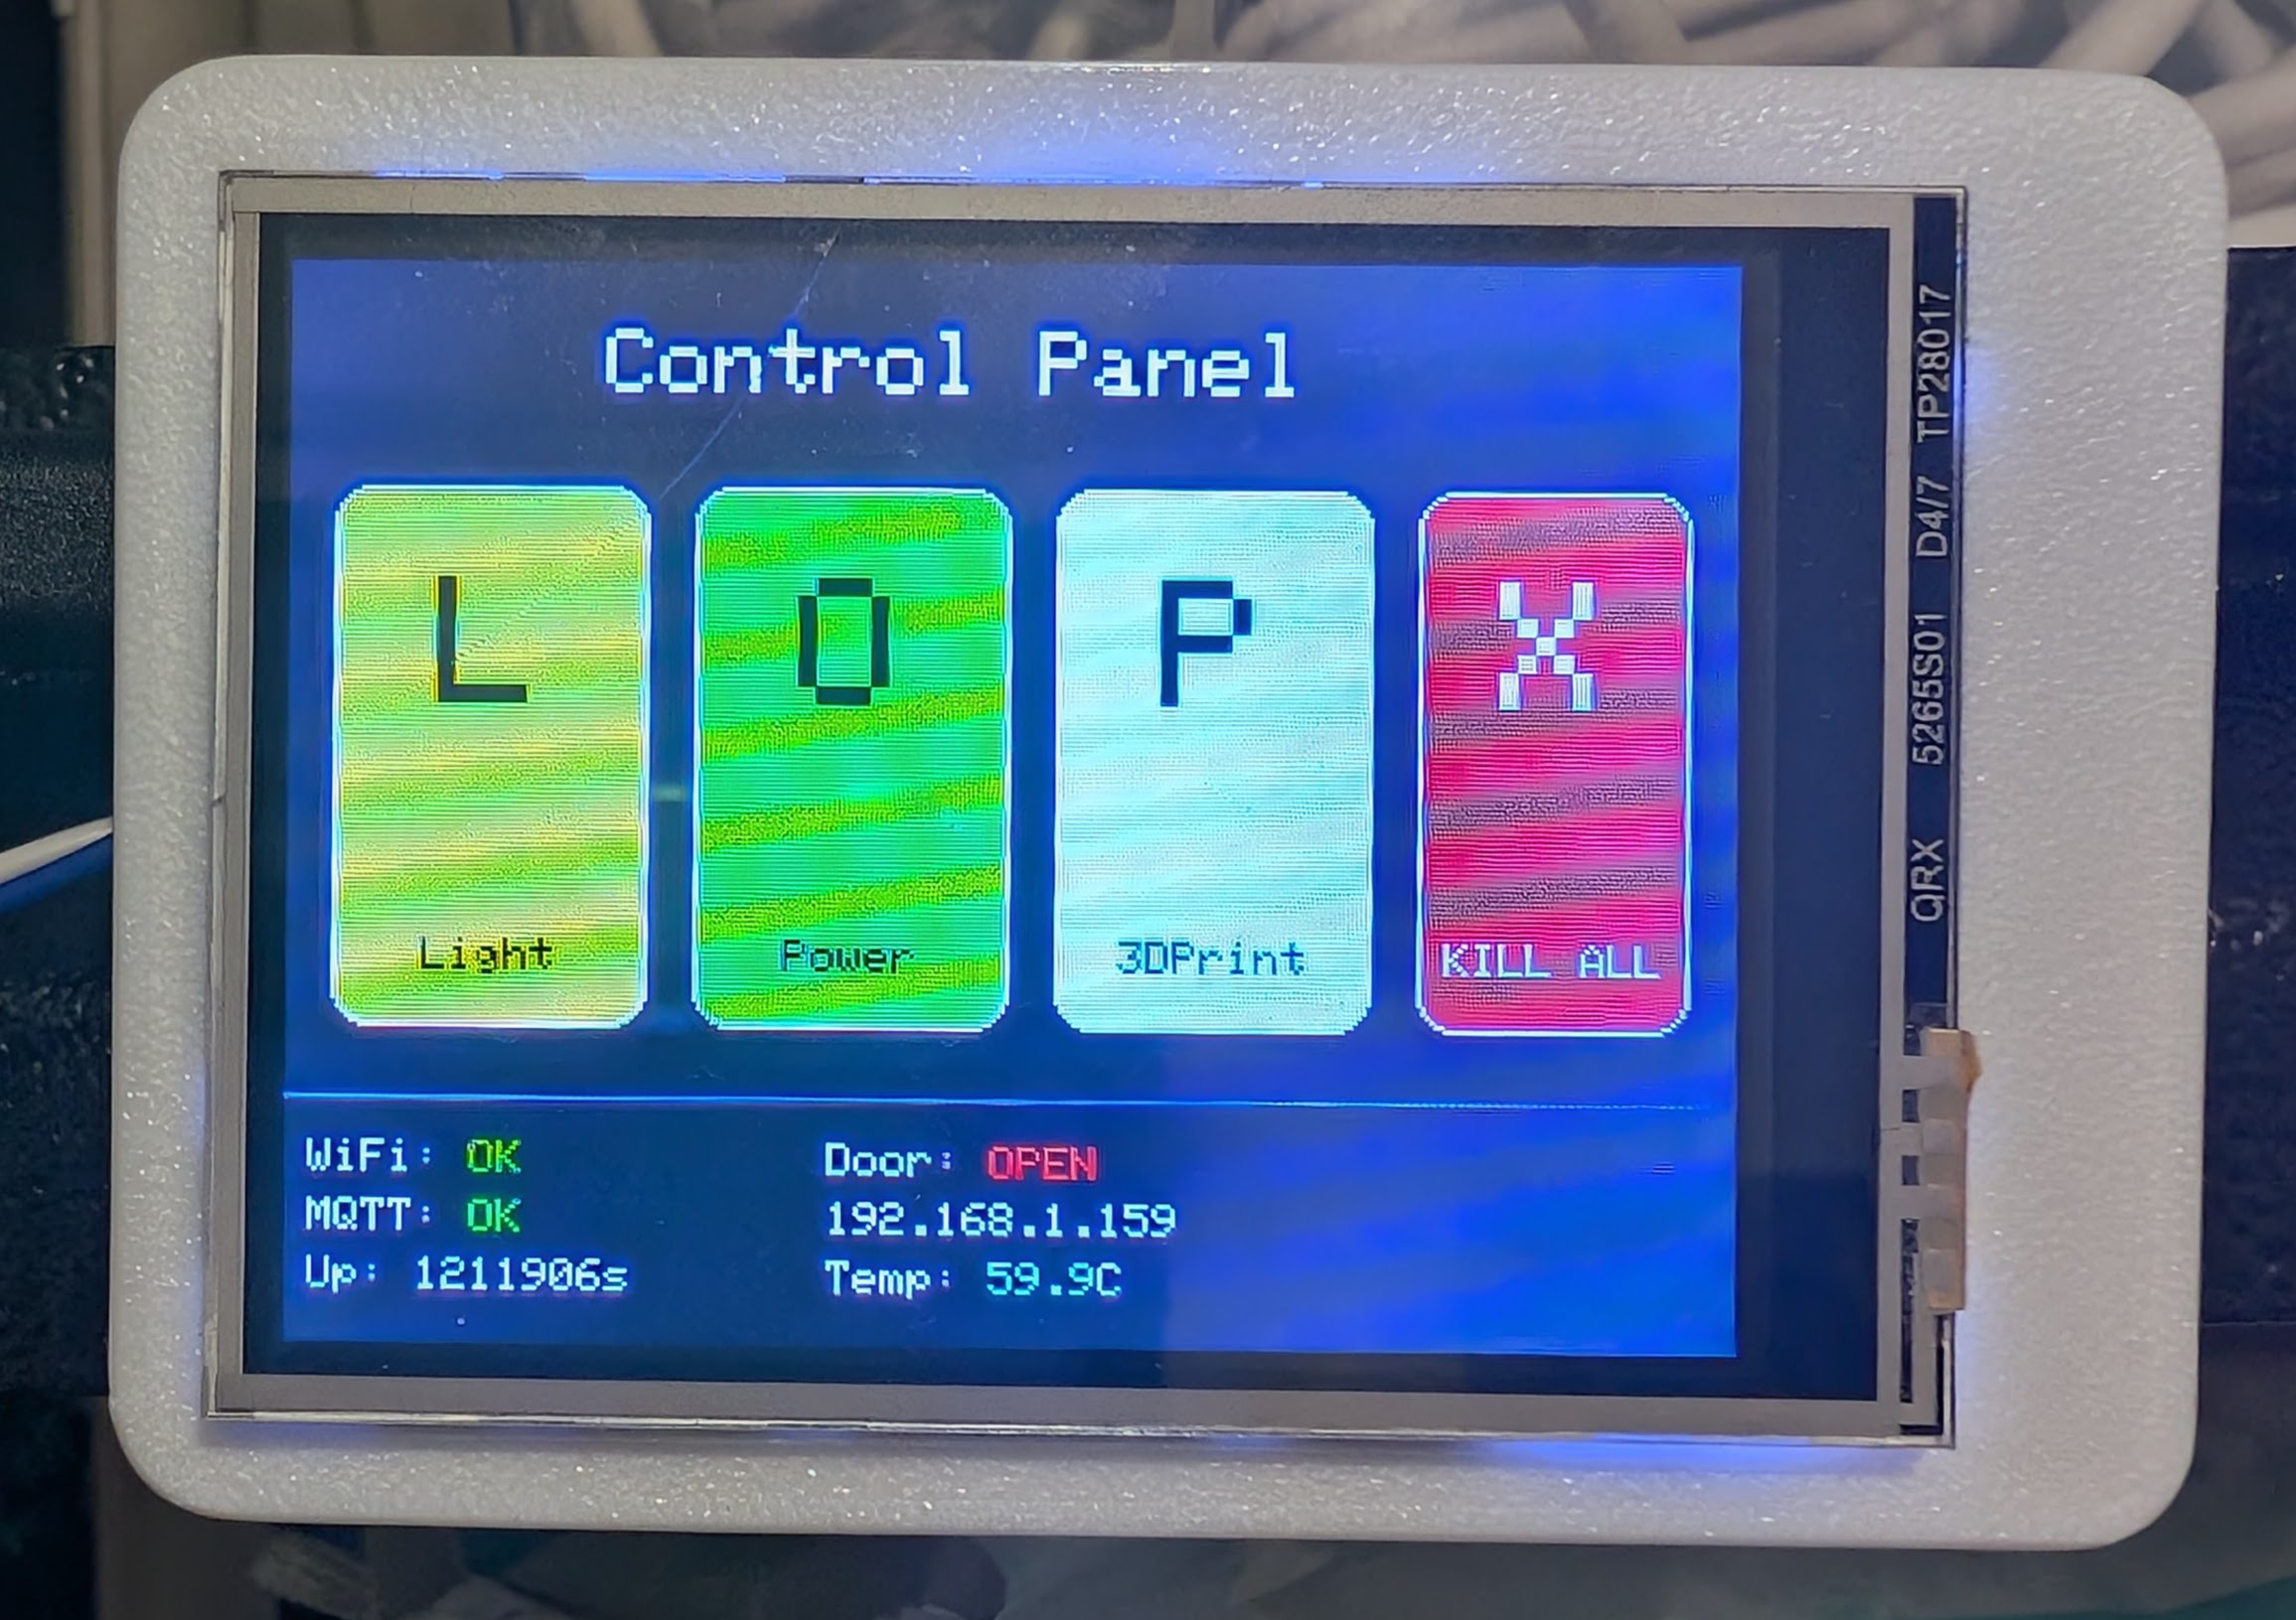
Touch buttons (Light / Power / 3D Print)
Tap to toggle — publishesONorOFFto the matching MQTT topic. HA responds by publishing the new state back to/state, keeping the display in sync even if someone changes the device from a phone or voice assistant. -
Kill All / Start All button
Shows red Kill All if any device is on — one tap turns everything off. Shows green Start All if everything is off — one tap turns everything on. -
Physical button — multi-tap & long press
Publishes"1","2","3"(taps within 500 ms window) or"long"(held ≥ 1.5 s) tohome/buttons/office/tap. Wire up HA automations however you like — e.g. double-tap = all lights off. -
Reed switch door sensor
Publishes"open"/"closed"retained tooffice/door/stateon every state change. Shows in the status bar at the bottom of the screen. -
Internal temperature sensor
Reads the RA4M1 MCU's onboard ADC every 2 seconds, displays it on-screen in cyan, and publishes to MQTT so Home Assistant can graph it as a sensor entity. Auto-discovery config is sent on boot. -
Auto-reconnect
Wi-Fi checked every 30 s, MQTT every 5 s. The status bar shows OK / NO for both so you can see at a glance if something has dropped.
Notes & Gotchas
-
The TFT shield occupies most of the UNO's pins.
D1 (TX)is used for the physical button — disconnect it before uploading or you'll get garbage data on the serial line. - The temperature reading is an approximation using the ADC on A0 as a baseline. The RA4M1 doesn't expose the internal temp sensor directly via standard Arduino APIs yet — treat the values as indicative, not precise.
-
Touch calibration constants (
TS_MINXetc.) may need tweaking for your specific shield. Print rawts.getPoint()values to Serial to calibrate. -
The sketch uses
INPUT_PULLUPon both the button and reed switch — so both are active-low (connect to GND, not 3.3 V).